How to make a teepee in under 60 minutes!
Here is our quick and easy guide to making a kids teepee in under 60 minutes. We like this guide because it doesn't require sewing, power tools or fiddly measuring and cutting, just lots of enthusiasm and a big smile!
Get started:
- Why should I make a teepee?
- What do I need to make my kids teepee tent?
- Accessorising your teepee
- Instructions on how to make your teepee
- What's the difference between a teepee and a wigwam?
- How to make a kids tent in under 60 seconds
- What do I need to make my kids play tent?
- Instructions on how to make your play tent
1. Why should I make a teepee?
It's lots of fun and only a little hassle. Your kids will love the teepee tent. Use it as an indoor or outdoor teepee. If you want something more complicated, we provide some links to other teepee instructions at the end of this blog. If you want something a little different, we also show you how to make a kids tent using an easy to make frame and sheet.
Every child loves a teepee. They are a great source of fun outside in the summer months or an indoor teepee tent is a lovely addition to a kids bedroom any time of the year. Yes, you can go and buy one online if you have a spare £100 but that seems like a lot to spend on a few sticks and a bit of cloth. More importantly, making the teepee is lots of fun! So here’s your chance to impress your kids and have huge amounts of fun together along the way.
2. What do I need to make my kid's teepee tent?
Here are the essentials you’ll need to make your kids teepee. Don't worry if you haven't got exactly the same materials. Part of the fun is all about imagination, so just use what you have to hand!
- 4 pieces of wood or sticks. I used 2.4m long, 34mm x 18mm soft planed wood from our local DIY shop but bamboo canes or similar sized poles will work well.
- A ball of jute or string. I used 2mm jute twine in green but any string will do.
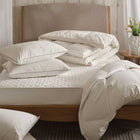
- A sheet or duvet cover. King size or Super King is best. I used one of our new Scooms sample duvet covers. If you don’t cut or paint it you can use a sheet or duvet cover and put it back on the bed afterwards, perhaps after a wash! Or if you are getting new bed linen, a teepee is a great way to find a use for your old bedding.
- A few clothes pegs - everyone has some at the back of a drawer or cupboard.
- Some large safety pins in case you need something stronger than a close peg. Safety pins are better if you intend to keep your teepee up for longer. If it's just for a day, clothes pegs are fine.
- A pair of scissors to cut the string.
- A big smile.

3. Accessorising your teepee
Any self respecting adventurer will also want to think about accessories and supplies for their teepee. Just start with your imagination and go from there. We used:
- Some bunting (you could make your own).
- Fabric paints - great for a bit of extra creativity. We suggest painting your teepee outdoors.
- Cushions or blankets. An old duvet works great.
- Lights or a torch.
- Some lovely home made lemon cake (our favourite).
- Strawberry water (just cut up some strawberries and leave them in a jug of water).
4. Instructions on how to make your teepee
First you need to make your frame: Grab your 4 poles and set them up in the shape of your teepee - a pyramid. We crossed ours about 50cm from the top and spread the poles about 1m apart at the base. You can experiment a little to get a size and height that suits your room if you are making an indoor teepee or adjust it to the height of your kids. You may want to test the size by getting another person to wrap the sheet around it. Adjust the poles if necessary.

Next, fix the frame together: Now get your string or twine and wind it around the sticks or canes where they meet. I found that an extra pair of hands certainly helps.


Time to add the teepee cover: So now you have your frame, wrap your sheet or duvet cover around the frame and peg it at the top using the clothes pegs. A large safety pin or two at the top can also be a good idea if you want something a little more robust.

Finally, finish the set-up: Wrap the sheet around the frame and use some more pegs to hold the door open. Again you can experiment depending on the size of your teepee sheet and frame. You should have some thing like this.

Well done! You've made your indoor teepee. Time to let the kids play and get accessorising.
Here's Penguin and Buster getting in on the action.

Teepees are also great fun out side when the weather is obliges. Here's ours:
If you want to check out any other teepee making guides, here's our pick of the top 4 best guides on how to make a teepee:
- The DIY Mum. A great looking teepee. You will need to be able to sew for this one. Visit Sew a DIY teepee play tent.
- From a site called Personal Creations. Takes over 6 hours to make and requires drilling and sewing. But you net a nice teepee and well written instructions. Visit Personal Creations.
- Julie Banners Blog. No sewing needed to make this teepee but requires a drill. Visit Julie Banner.
- Ok so not a home made teepee but a site where you can buy one. Not cheap but they look great. Visit Scandiborn.
5. What's the difference between a teepee and a wigwam?
While I was writing this blog, I wondered what the difference was between a wigwam and a teepee. Here's what I found out:
- Both are names for generic categories of traditional Native American shelters.
- One of the main differences between a wigwam and teepee is that teepees are very portable and wigwams are much more stationary. Wigwams are dome-shaped while teepees are more tent-like.
- A teepee is traditionally made from buffalo hides sown together and wrapped around a tripod or cone of poles. The teepee was easy to disassemble and transport, using the poles to make a 'sled' to drag behind horses or dogs.
- A wigwam is more like a cabin. It has a frame of bent poles covered with pieces of bark or skins. This type of shelter is semi-permanent and not transportable.
6. How to make a kid's tent in under 60 seconds
Fancy something a little different from a kids teepee? Here's a simple guide to making a kids play tent. Again, no sewing, power tools or fiddly measuring or cutting required, just a bit of enthusiasm and a big smile.

7. What do I need to make my kid's play tent?
As with the teepee, you will only need a few essentials. We used:
- 7 pieces of wood or sticks. I used 2.4m long, 34mm x 18mm soft planed wood. You may want to use shorter pieces for the 4 uprights. It's up to you. When we made our tent, we only had 6 pieces of wood of the right length so we simply joined the 2 shorter ones together.
- Instead of using the twine that we used if for the teepee, we used Gaffa tape. It doesn't look quite as pretty but it's much stronger as the tent frame is not as naturally stable as a teepee.
- A Scooms King size duvet cover or a sheet/several sheets will do just fine. We ended up using 2 duvet covers on our tent.
- Clothes pegs.
8. Instructions on how to make your play tent
First you need to make your tent frame: Get 2 poles and cross them over. You can experiment a little to get a size and height that suits you. Once crossed over, get your Gaffa tape and wrap it around the 2 poles to secure them.

When you have fixed the first pair together, lay them flat on the ground and put the next pair on top of them so that they are the same length as the first pair of poles. Now fix the second pair of poles together with tape. You should now have 2 tent ends that are the same.
Get a helper for the next bit: Hold both tent ends up, then get another of your poles and put it on top of each cross member. Tape it in place. Then tape in place 2 side bars to connect the ends of the frame. You need this to add extra strength to your tent. You should now have a frame that looks like this.

Adding the teepee cover: Get your sheet or duvet cover and drape it over the frame. We ended up using 2 covers for our tent. Using your clothes pegs, fix it to the poles. We also found it worth adding some guide ropes at each end to give it some extra strength.
Now add a little imagination to finish off your kids play tent.
Thanks for reading. Enjoy your teepee building!
